Here is a link to my evaluation:
http://www.youtube.com/watch?v=KsNiWfiCBUA&feature=youtu.be
Saturday, 4 May 2013
Friday, 3 May 2013


Thursday, 2 May 2013
Process 3
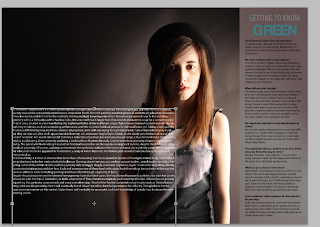
PROCESS OF FEATURE PAGE
PART 1. THE MODEL

1. To begin, I created a new photoshop document in the size of A3, a double page.


2. I then imported the picture I was going to use.

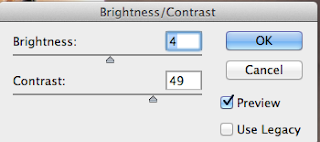
3. The next step was to adjust the brightness and contrast.


4. Using the dodge tool, I whitened the teeth.


 5. Using the grid, I put a line down the middle of the page to ensure I knew where to place everything.

 6. I then darkened her eyes slightly with the paintbrush, to match the ones on the cover.
7. I overlaid the layer so that it was not as strong.


 8. Using the quick selection tool, I selected the model.
 9. I then inverses this.

 10. The background was blurry, so I did a surface blur on it.
 11. This left the edges ragged, so I went around them with the smudge tool, and also the blur tool.


12. As the models' arm was not quite right for a magazine, I used the warp tool.


 13. I used the brush tool as eyeliner, and set it to overlay so it was not so prominent.
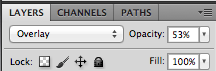


 |
| THE MODELS' SKIN BEFORE |
 15. Using the eyedropper tool, I picked up the neutral skin tones of her skin.
16. On the layer created, and using the skin tones, I painted onto her face with the paintbrush tool.


17. I then used the smudge tool to blend them together, and turned the opacity of the layer down.

PART 2. LAYOUT


2. I then set the box layer to exclusion.

3. Using the text tool, I typed 'Getting to know green' in turquoise and different sizes


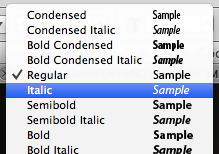 4. I then copied and pasted my interview into a text box with white text. The font was Myriad Pro in Regular.

 5.I then highlighted the questions and put them in bold, then turned the text black and put the whole text box into rectangle, where I had to resize it.
6. The next step was to copy and paste my article into a text box, which I resized.

7. Following my flat plan, I shaped the text around the model by pressing enter on each line when the writing came close to her.

8. At the bottom of the article, I wrote my name and website, with the features of text as to the left.

9. I tried the text in turquoise, but I wasn't too keen on it.

 10. Using the eye drop tool, I selected a baby pink colour from the models' vest and changed the colour of my name and website.


12. I went onto the website 'DaFont' and picked out a font of which was appropriate.

 13. I then took a screenshot of each line, and imported it into photoshop, ridding of the white background with the magic eraser tool.

14. After putting all of the lines together, I set the layer to exclusion.

Subscribe to:
Comments (Atom)